
Now that I've finally recapped some of my past projects, I hope to get a post up about my latest projects: a wine crate bookcase and a wine bottle lamp. Also, I'm hoping to post more often with new interesting sites, sustainable design news articles, and hopefully some new ideas.
Stick around.
Thursday, November 13, 2008
Allen Newell Garden
 This is the most complicated project I have been involved with and certainly the coolest. This cantilevered concrete slab seating area was constructed as part of my Design and Construction course during my senior year at Carnegie Mellon. The project was a memorial to Allen Newell, a CMU computer science professor and AI pioneer. This project was designed and built by CMU students, though the majority of the credit goes to Professor Larry Cartwright of the Dept. of Civil and Environmental Engineering. He was by far the best teacher I've ever had. As the ancient proverb says:
"Concrete doesn't fail at 3000psi, it fails when Larry Cartwright tells it to"
 The site was on a steep slope in front of the current Computer Science building on campus, and obviously provided many challenges. The building formerly was the US Bureau of Mines facility and had two 90-100ft smokestacks in front of it. When the school acquired the building, the smokestacks were truncated and capped to the elevation you see above. This truncated structure was our site and would become the foundation for the entire project. Three piers were poured leading up to street grade to support the alternating square slab design that was chosen.

 We designed our own form-work and poured the concrete ourselves. The concrete slabs have planters sunk into them and a handicap accessible ramp runs through the four alternating squares.
 I left my permanent footprint below where the ramp would be strung.
 I spent an extra month at school during the summer to see the project to completion. We used Trex, a material consisting of recycled wood and plastic, to deck the ramp and sitting area. I had custom cut each board on the ramp to fit the curve in a process that took nearly a week but ended up looking fantastic. We put sedum, a durable breed, in the planters.
 We custom made these benches out of cedar with mahogany swing tables for laptop use. We designed the slope of the benches specifically for comfort and the finished product was beautiful. In the end, these are likely the three most expensive and well thought out benches in Pennsylvania.
 The project was finished with custom made finished glass (the only thing we didn't fabricate and install ourselves). The glass was etched with the names of everyone in the class and prominently with a quote for Allen Newell:
"To each scientific life its own style: and each style defines a life"
We also landscaped the site around the platform with ivy and native plants. Along the wall behind the structure we installed a stainless steel "living wall" system to encourage ivy growth to hide the concrete walls. The site has both electrical outlets and wireless internet access. It is a fantastic testament to a bunch of very talented students and an extraordinary professor.
Check out the webpage: Allen Newell Garden
Episcopalian Coffee Table
 This project was a housewarming gift for my sister who needed a slim table for her living room. Its made out of two mahogany single pane office windows reclaimed from a former Episcopal Church in Pittsburgh and four old mahogany bed posts. I used two windows to create a space to store books and magazines. All the materials for this project were acquired for under $40 at Construction Junction in Pittsburgh, one of the most innovative material re-use organizations in the country. Fortunately, I had use of the Civil Engineering wood shop at school which allowed me to get a little more creative with this table. First, I had to clean up the windows by removing the old hinges and locks. I also needed to reinforce the molding holding the panes to the window frame with finish brads and wood glue. I used a dado blade on the table saw to cut slots in the bed posts for the window frames to sit in and a miter saw to cut down the legs and to crown the posts. I used a finish brad gun and wood glue to connect the windows to the legs and stainable wood filler to fill the joints and dark stain on the joints. For the most part, I left the table unfinished because the wear on the bedposts and windows gave it great character.
TOTAL COST: $45
Wednesday, November 12, 2008
Interactive Bench Bookshelf
 This project evolved from a project I had worked on during my freshman year in Architecture school. The project involved creating a bench for two people designed such that it could be broken down to fit into a large shoe box. As with all of my Architecture projects, the bench also had to be designed with a concept in mind. One of the things I have always found fascinating about working with wood is that more than any other medium, wood has its own memory (See 'stump clock' to come soon). You see it in both its rings and knots, as well as the way it wears. From this I focused on a structure that required interaction between the two people and the bench itself. Hence the "teeter-totter"-esque shape of the bench you see in the prototype below.
 I used cherry for the legs and walnut for the seating slats. The light red of the cherry and the dark hues of the walnut created a contradiction that "emphasized the structural elements as the signature aesthetic" (I learned to master BS in Architecture school). The leg supports consists of varying lap joints with 1/4 inch bolts. The walnut slats have fixed splice joints to allow them to be connected to the leg supports. Both the cherry and walnut components were finished using tung oil. By the time my final presentation came along, I could assemble the bench in less than ten minutes. Though it was chosen as a finalist and was shown at a gallery show in Belgium, I never could find a practical use the bench at home. After four years of collecting dust in the attic, I decided the wood was too beautiful to not be showcased in my then furniture-less apartment. It would need, however, to be converted into something more practical:
 I decided on a bookshelf/nightstand as it would be an easy transition from the current structure. I found an old 1/2 inch pine board in my father's basement and cut it into six shelves of two different sizes. Orienting the bench leg supports vertically and using stainless threaded rod for additional support allowed for a floating shelf feel. I used the walnut slats to beef up the base of the shelves and for backing behind the shelves. It was tricky to place the drill holes correctly, but a small mdf template and a lot of trial and error got the job done. I really liked the mixture of modern fasteners and traditional woods with the bench, and adding the threaded rod and bolting only added to the aesthetic. I left the pine shelves unfinished because I found their roughness and unfinished coloring to go perfectly with darker wood components on the rest of the bookshelf. While this is in not your typical reclamation project, the bench project was likely bound for the dumpster without this recreation. Here are a few more photos:

 TOTAL REDESIGN COST: $25
Monday, November 3, 2008
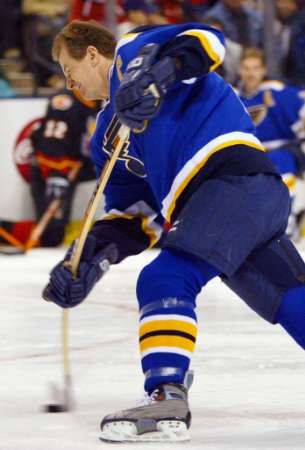
Hockey Headboard

 This isn't as much a headboard as it is an installation piece. I am a big hockey player and this piece is made of 25 stick shafts from my career. This piece means a lot to me as each of these sticks carried a lot of memories and scored a few goals. Hat tip goes to my dad for storing these sticks in his basement (some for over ten years), while I tried to figure out what to do with them. I wanted to do something a little more creative that the typical hockey stick chair...
 ...and I could not bear the thought of someone sitting on or books covering these remnants of my hockey past that contained so much character, so I decided on something to showcase them that would cover the bare walls of my new apartment. I chose to cut the shafts at varying lengths in part because they reflect my physical growth through the years and also because this format showcases the evolution of how I taped my sticks (an art in itself, I am a short knob toe-to-heel kind of guy). The "hockey headboard" also shows the evolution of hockey stick technology as its chronology includes my first ice hockey stick (an Easton aluminum), fiberglass and graphite designs, many traditional wood sticks (my high school stick of choice), and a few fancy one piece composites (my college sticks of Ice Tartan fame). I made an MDF template for drill holes on the stick shafts and 1/4" threaded rod and a drop of thread lock on the bolts to tie the sticks together. Despite years of thought, this one was pretty easy to pull together.
TOTAL COST: ~$15 dollars, 10 Concussions
 I am looking forward to making more hockey stick projects, I am just going to need to break a few more sticks. Something like this awesome stick chandelier at the NHL store in NYC?...
 TOTAL COST: $15
Sunday, November 2, 2008
Inspiration
 Its important for me to acknowledge my inspiration in this hobby of my mine. While I inherit my mom's artistic creativity and my father's pack rat tendencies (he collected Domino's pizza boxes and Altoid tins for ten years), I must say it comes directly from my friend Seymour Rappoport. Seymour was a mentor, friend, and surrogate grandfather to me. He was a product engineer for the Ronson Corporation and holds patents for the original cigarette lighter patents. I stumbled upon these patents online and it saddens me that it seems these patents are the only lasting legacy of Seymour, as his true life's work came later in life as a sculptor. After surviving cancer and suffering a stroke, I had the honor of helping Seymour in his studio with his projects and escorting to his many material "suppliers". We made weekly trips to the scrap yard and stalked Central New Jersey's garage sales. Seymour made a point of visiting every new construction site in his neighborhood and those trips with him were very formative towards my interest in architecture and the building industry. His home and his studio were the epitome of high design, and I grew up lounging on an original Eame's chair and two of Mies van der Rohe's Barcelona chairs in his living room (years later I would have classes devoted to these designs in Architecture school).
 His arthritic cartoon-like lighting bolt fingers told 1,000 stories of projects made and innovations forged. Though I doubt any of his designs had the environment or sustainability in mind, he was a master of re-use projects and reclaimed materials. There is a scrap yard in West Long Branch, NJ that still boasts one of us his sculptures made entirely of their heap. So I'm hoping Seymour's legacy lives beyond his cigarette lighter patents, and hopefully a little bit in my projects.
 This was my high school graduation present from Seymour, made out of leftover parquet flooring he pirated from a local basketball gym refinishing.
Subscribe to:
Posts (Atom)
.JPG)